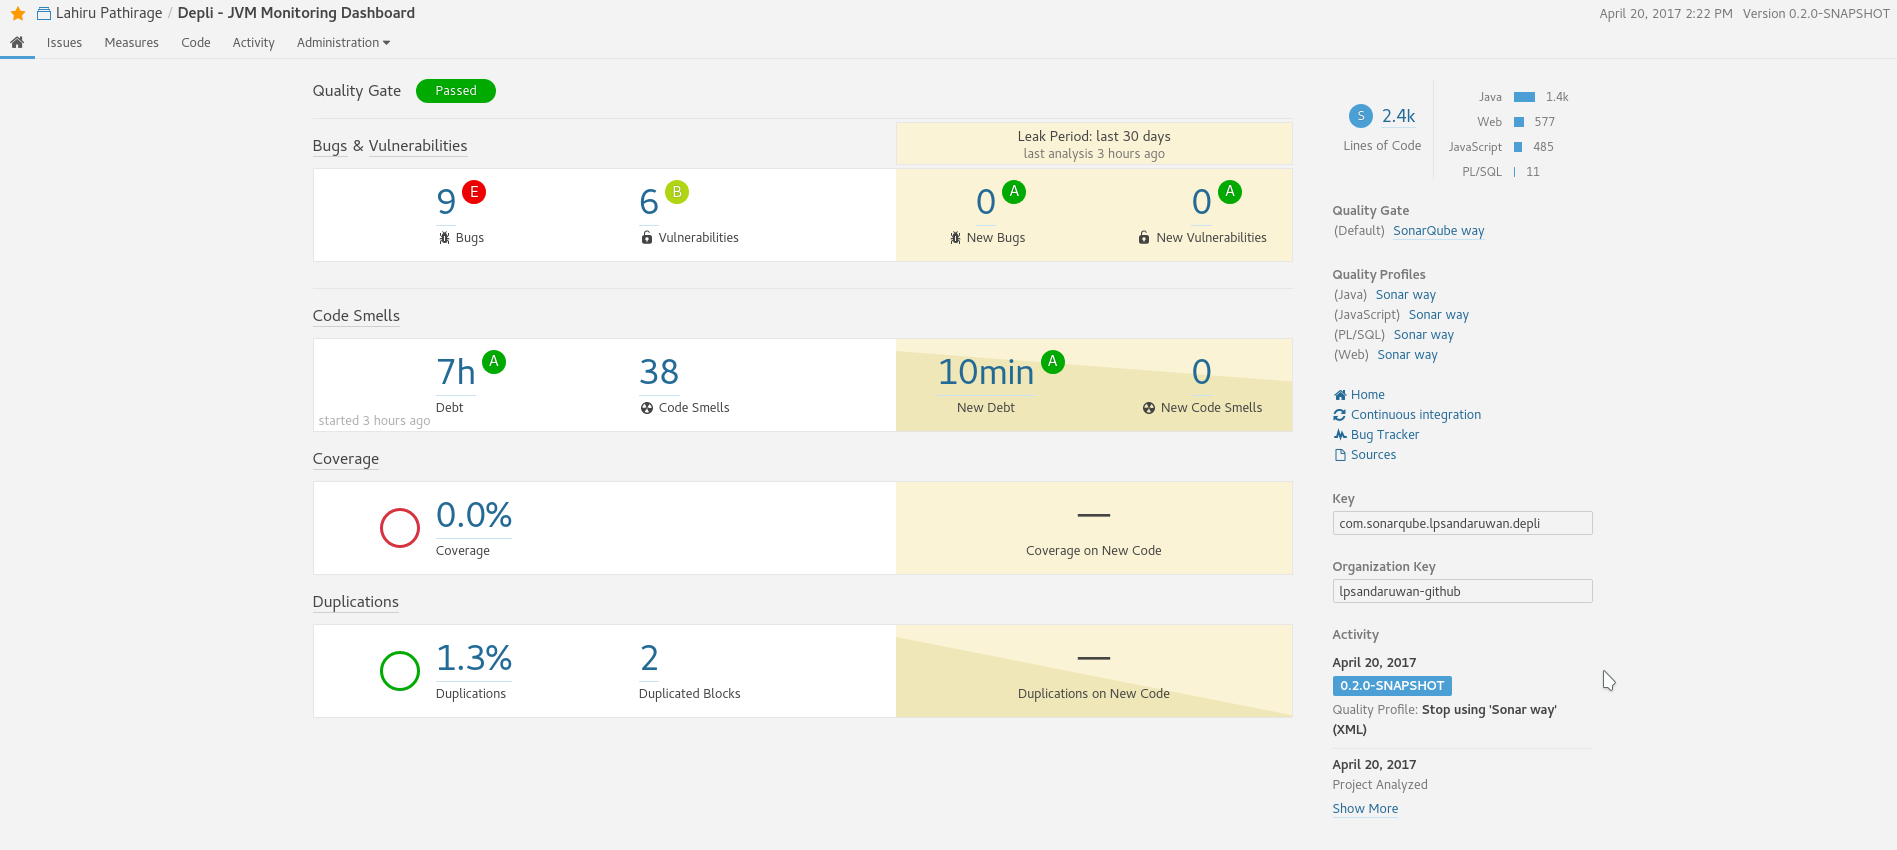
Good quality in code plays an essential role when it comes to software, thus it assets efficiency, reliability, robustness, portability, maintainability and readability like essential factors. Considering a GitHub project, there are plenty of options to measure code quality. Considering options I would like to chose SonarQube for this particular purpose. Let me take down the steps, how I used SonarQube to measure code quality using a Java project, one of my GitHub hosted projects, Depli.
NB: The best way to analyze a maven project is to use the maven sonar plugin as the SonarQube docs says.
You do not require a sonar-project.properties in that case.
Step 1 - Create an account in travis-ci.org
SonarQube needs sonar-runner to analyze the code. To run the analysis process using sonar-runner on code changes continuously, the ideal solution is using a CI server. Here I had to use Travis-CI since it is the perfect matured CI solution for GitHub projects.
I created and logged into Travis using my GitHub account and activated it for my repository.
Step 2 - Create an account in sonarqube.com
Then I created and logged into SonarQube using the same GitHub account.
Step 3 - Create Travis-CI configuration file
Next step was to create a configuration file for Travis-CI to instruct it to how to run the sonar-scanner as known as sonar-runner.
To do that I created a .travis.yml, A YAML file in my project’s root directory.
dist: trusty # chose ubuntu trusty as the worker

sudo: required

addons:
  sonarqube:
    organization: lpsandaruwan-github # organization token from https://sonarqube.com/account/organizations

jdk:
- oraclejdk8

script:
- mvn clean install -DskipTests # skipped tests because I have not written.
- sonar-scanner # tell travis to run sonar scanner

cache:
  directories:
  - "$HOME/.sonar/cache"
step 4 - Create a SonarQube token
After creating a Travis configuration file I generated a security token and copied it to clipboard,
for Travis to use when updating SonarQube database.
Step 5 - Encrypt SonarQube token
Public access to a security token is a bad thing. So I had to encrypt the SonarQube token when inserting it to Travis configuration file.
To achieve that I used travis from ruby gems.
cd /path/to/my/project/root
travis encrypt MY_SONARQUBE_TOKEN --add addons.sonarqube.token
Step 6 - Create a SonarQube configuration file
A metadata file including project details is required for SonarQube. So I created sonar-project.properties in my project’s root.
Here sonar.sources is the place where sonar-scanner starts to analyze.
sonar.projectKey=com.sonarqube.lpsandaruwan.depli
sonar.projectName=Depli - JVM Monitoring Dashboard
sonar.projectVersion=0.2.0-SNAPSHOT

sonar.links.homepage=https://lahirus.com/depli
sonar.links.ci=https://travis-ci.org/lpsandaruwan/depli
sonar.links.scm=https://github.com/lpsandaruwan/depli
sonar.links.issue=https://github.com/lpsandaruwan/depli/issues

sonar.sources=src/main
Step 7 - Add status to read me
Now to display the project status on readme, I added labels from Travis and SonarQube on README.md file.
[](https://travis-ci.org/USERNAME/PROJECT_NAME)
[](https://sonarqube.com/dashboard/index/SONAR_PROJECT_KEY)Bravo!
After following above steps I pushed all changes to GitHub. And waited until Travis sent me a mail confirming that my build has been successful. Now the readme is displaying the build status and whether my project has passed the quality gate.

By clicking on the quality gate badge, I can access the SonarQube dashboard, detailed analysis of code quality of my repository.

Please refer my open source project, https://github.com/lpsandaruwan/depli if there is any doubt.
Comments