
Why Arch Linux? Let’s Jump In!
Hey there, fellow developer community! If you’ve been browsing Linux distributions, you know there are tons of options out there. I’ve tested a few, gone on some Linux adventures, and finally landed on Arch Linux. And, wow, it’s been my go-to for over 11 years now. If you want a powerful development setup and want to learn Linux hands-on, Arch could be your golden ticket. Let’s explore why!
Starting Out with Linux
Before you dive into Arch Linux, get your feet wet with a few beginner-friendly options! Test out Linux Mint, Ubuntu, or Fedora on a virtual machine (like QEMU, VirtualBox, or VMware Player). These will help you get a feel for Linux without jumping straight into the deep end. Here’s what you’ll need to be comfortable with before going full Arch:
- Terminal Confidence: Yep, you’ll be typing commands often, so get cozy with the command line.
- OS Basics: Understand simple things like what a kernel is or why drivers matter.
- Hardware Awareness: Know a bit about your processor, GPU, network card, and RAM.
- Experimenting Spirit: Don’t worry—trying things out is part of the fun, and mistakes won’t blow up your machine!
Key Things for Choosing Your Linux Distro
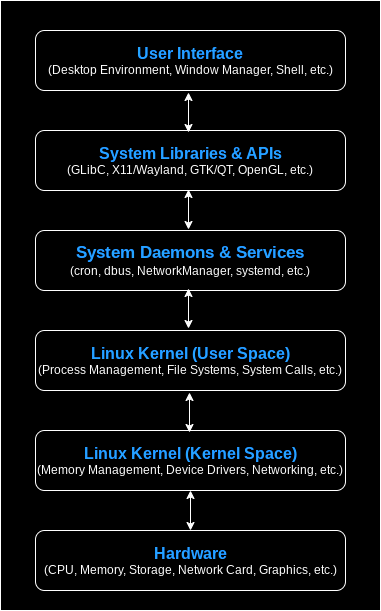
When you’re picking a Linux distro, think about a few important things. The image below breaks down what makes up a Linux operating system.
1. Hardware Compatibility
Your hardware and the Linux kernel need to play nice together:
- New Hardware? Go for the latest LTS (Long-Term Support) or mainline kernel to avoid compatibility headaches.
- Buying Gear? Avoid hardware with tricky proprietary drivers. Look up compatibility (especially wireless cards by Broadcom, Mediatek) before buying.
- Struggling with Hardware? If Wi-Fi’s not working, try connecting via Ethernet or using USB tethering, Wi-Fi dongles, or modems to stay online.
2. Types of Linux Releases
Distros handle updates in different ways, so here’s a quick rundown:
- Point Releases: Updates on a set schedule, like Fedora or Debian Stable.
- LTS: Long-term support versions (like Ubuntu LTS), with years of support.
- Rolling Releases: Continuous updates with no version numbers, like Arch and OpenSUSE Tumbleweed.
- Semi-Rolling: Updates in chunks, like Manjaro.
- Testing Releases: Think of these as beta versions, like Fedora Rawhide.
- Enterprise/Corporate: Rock-solid, long-term releases, like Red Hat.
3. Package Managers
Every distro has a package manager—tools like apt, yum, dnf, and pacman help install and update software. The beauty of Linux is, if the package you want isn’t available, you can usually find a binary or build it yourself!
4. Desktop Environments (DEs)
Linux has a ton of different desktop environments (DEs). Popular ones include KDE, GNOME, XFCE, and Cinnamon. Try out different DEs and find one that fits your style.
Why Arch Linux? Here’s Why I Love It
After all my trials, I stuck with Arch Linux. Here’s why it’s been amazing for me:
1. Fresh Software Always
Arch Linux has the latest software, always. That means you get all the new features, bug fixes, and patches as soon as they’re available. I always use decent gaming laptops for power and portability(compared to Apple logos their price to specs ratio is top notch), so having the latest kernel updates keeps everything going smoothly.
2. Community Power
Arch is powered by its community. The Arch forums are full of wisdom, and the Arch Wiki is a treasure of guides and troubleshooting tips. The Arch Wiki is so good that even users of other distros rely on it!
3. Rolling Release
Arch is a rolling release, so you’re always on the latest version. No re-installs—just constant updates that keep your system fresh.
4. Pacman Package Manager
Pacman is Arch’s package manager. It’s fast, simple, and handles dependencies smoothly. Just type a few commands, and Pacman does the rest.
5. AUR: Arch User Repository
The AUR (Arch User Repository) is a huge collection of community-maintained scripts for software. If you can’t find something in the official repos, it’s probably in the AUR. Tools like yay, pacaur, or octopi make it easy to install AUR packages.
6. Zero Bloat
Arch only has what you choose to install—no unnecessary pre-installed software, just the stuff you actually want and need.
7. Build-Your-Own OS Vibes
With Arch, you’re the creator. Setting it up lets you build a custom OS tailored to your needs. It’s challenging but super rewarding, and there’s nothing like the feeling of running an OS you crafted yourself!
Let’s Begin 🚀
Alright, you’ve got the scoop on why Arch Linux is worth it, so let’s start cooking our very own operating system!
Step 1: Boot Up the Arch Linux Installer 🖥️
- Download the ISO: Head over to the official Arch Linux download page and grab the latest installation
.isofile. This file will help us get started! - Create Bootable Media:
- On Windows: Use tools like Rufus, YUMI, or Ventoy to make your USB drive bootable.
- On Linux or WSL: You can use the
ddcommand to write the ISO to a USB drive. - On a Virtual Machine: Just load the ISO directly into your virtual machine.
Note: If your hard drive is already full, you might need to shrink an existing partition to create some unallocated space for installing Arch. About 40GB should be more than enough.
-
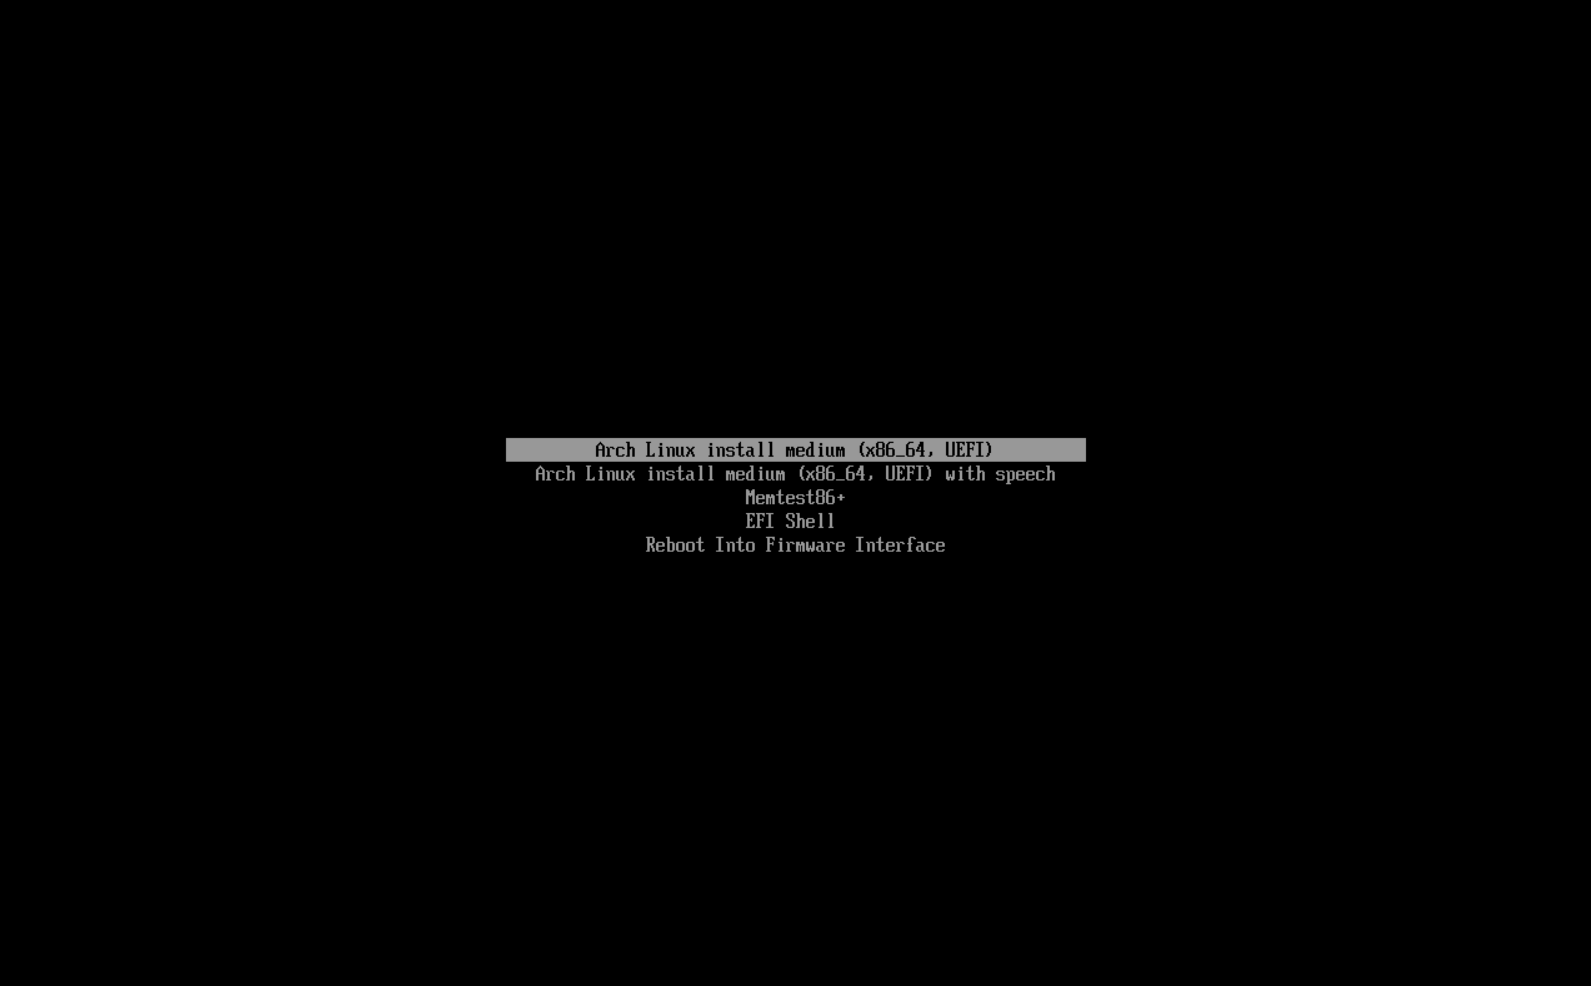
Boot It Up: Insert your bootable media into your PC and restart it. You’ll see the installer menu—choose the first option to kick things off!
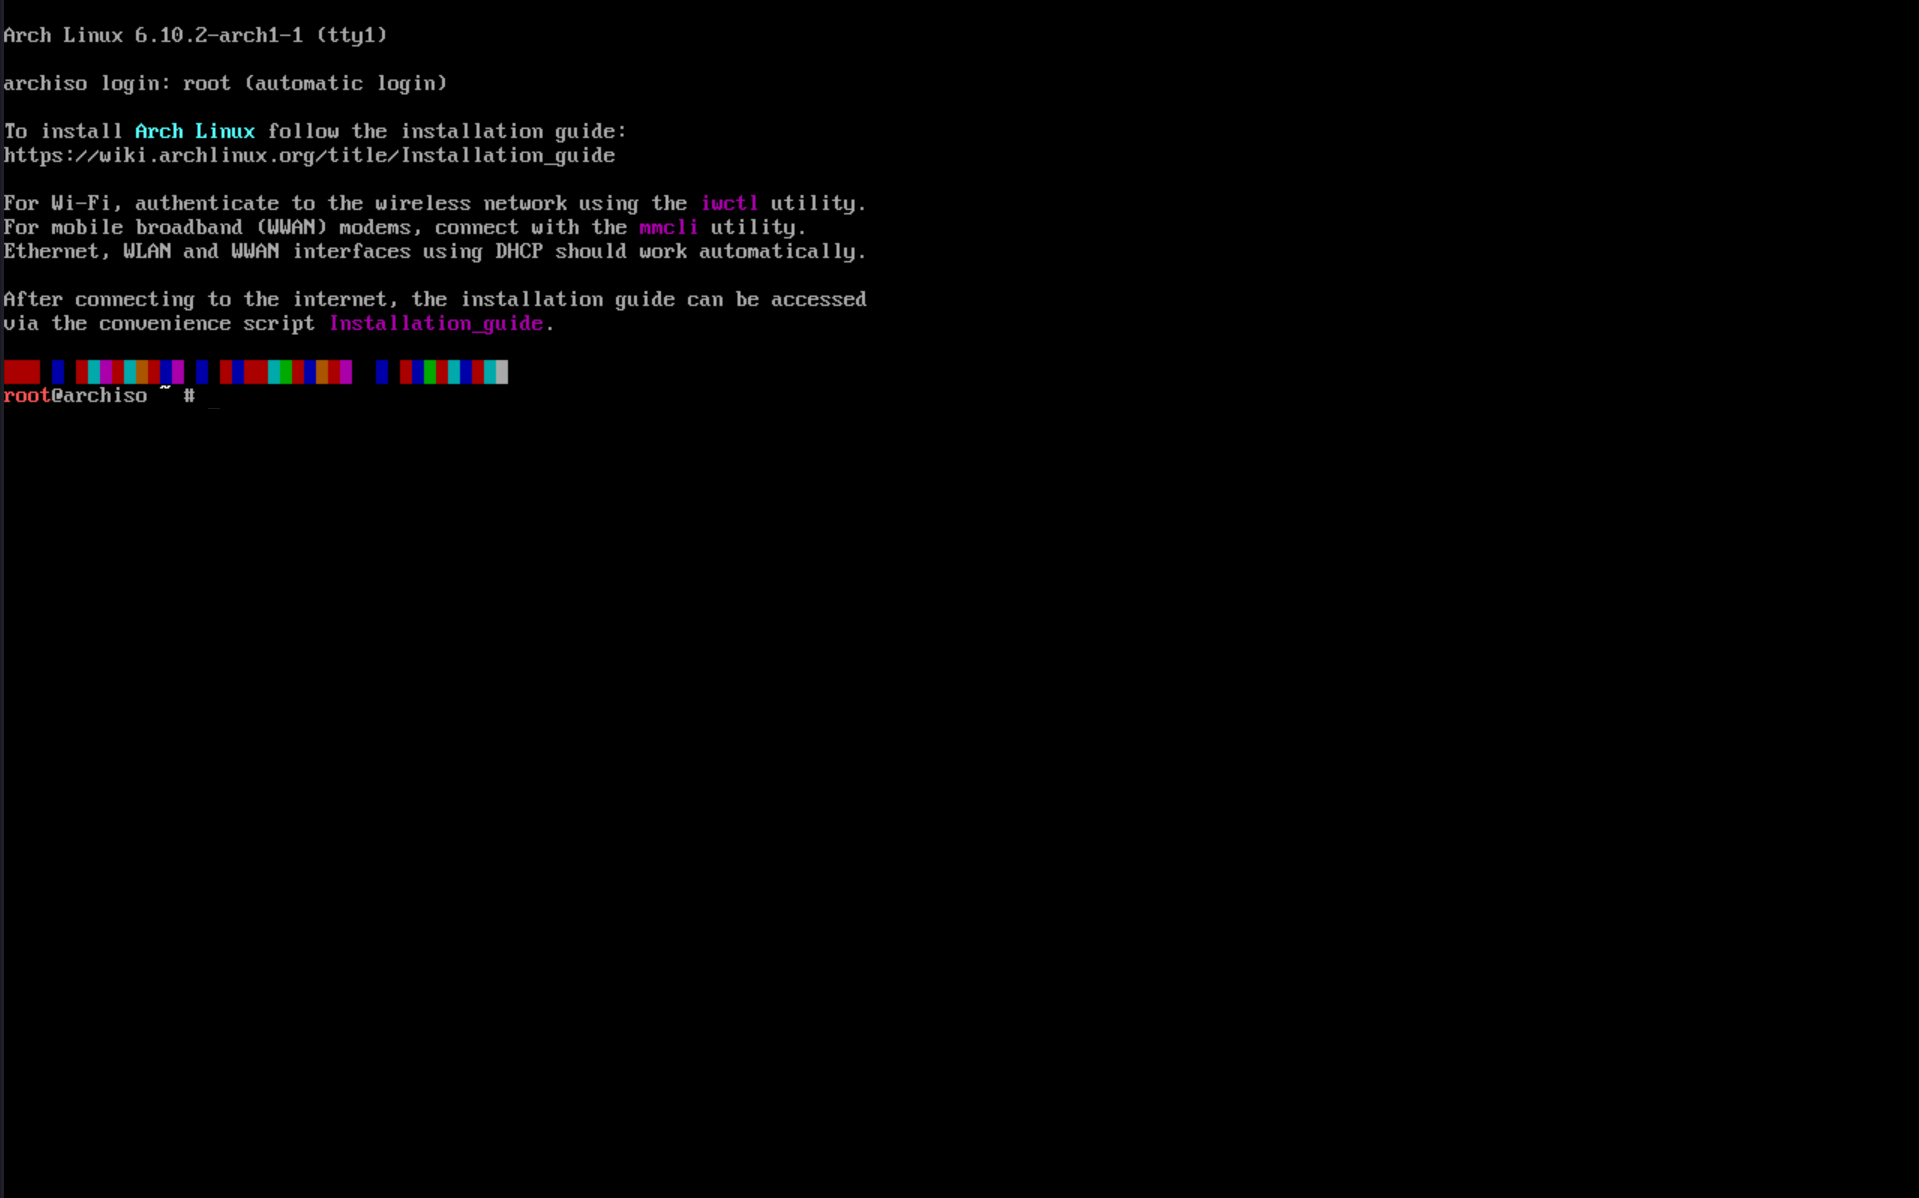
Now, you should see a root terminal waiting for you.
Step 2: Configure Network 🌐
We need an internet connection to download the packages that will build our system. Let’s find the network interface!
List Network Interfaces
ls /sys/class/net
This command lists all network interfaces. You might see something like:
enp12s0 lo wlp0s20f3
lo- Ignore this one; it’s just a virtual loopback device for local communication (like talking to yourself; localhost, 127.0.0.1 …).
If You’re Wired (Ethernet)
If you have a cable plugged in, you’re good to go! No extra steps needed!
If You’re on WiFi
The wlp* device is likely your WiFi. Let’s confirm it:
(
dmesgcan show logs for device initializations at the kernel level.)dmesg | grep -i wlan
We’ll use iwd to set up WiFi. Run these commands in sequence:
- Start the
iwdInteractive Shell:iwctl - List Devices:
device list - Power On WiFi (if it’s off):
device wlan0 set-property Powered on # wlan0 is the name of the WiFi interfaceIf there’s an error, check if it’s blocked by
rfkill: (rfkillis a tool for managing radio devices like Bluetooth and WiFi; it helps with security and blocking issues.)rfkill - If it’s blocked, unblock it and try turning the device on again:
rfkill unblock wlan && device wlan0 set-property Powered on - Scan for Networks:
station wlan0 get-networks - Connect to Your Network (enter your WiFi password when prompted):
station wlan0 connect "Network_SSID" - Check Connectivity:
Let’s do a quick test to see if we’re connected:
ping -c 3 google.comAnd that’s it! Your network is set up, and we’re ready to install Arch. 🎉
Step 3: Preparing Disk Partitions 🗂️
Alright, let’s get ready to create some disk partitions! This is super important because a tiny mistake can wipe out your data. We’ll use a tool called cfdisk that gives us a nice visual interface to manage our disks.
Understanding Linux File System
Before we dive in, let’s take a quick peek at what the Linux file system looks like. We’re going to create something similar on our hard drive!
/
├── bin         # Important command files (like ls, cp, mv)
├── boot        # Boot files for starting up your system
├── dev         # Device files (like hard drives and USBs)
├── etc         # Configuration files for your system
├── home        # User home directories (like /home/user)
├── lib         # Essential libraries for commands
├── media       # Mount points for USB drives and CDs
├── mnt         # Temporary mount points
├── opt         # Optional software and packages
├── proc        # System information
├── root        # Home directory for the root user
├── run         # Temporary files since the last boot
├── sbin        # System administration commands
├── srv         # Service-related data
├── sys         # Kernel and system information
├── tmp         # Temporary files cleared on reboot
├── usr         # User-installed programs and libraries
│   ├── bin     # User-installed command files
│   ├── lib     # Shared libraries for user commands
│   └── share   # Shared files and docs (like icons)
└── var         # Variable data (like logs and databases)
    ├── log     # Log files
    ├── cache   # Cached data
    ├── lib     # Variable library files
    └── tmp     # App-created temporary files
1. Identify Your Disk 🧐
First, we need to find out which disk we want to install Linux on. The command below will show you the disks and their sizes:
lsblk
You’ll see something like this:
NAME        MAJ:MIN RM   SIZE RO TYPE MOUNTPOINTS
nvme1n1     259:0    0 953.9G  0 disk
nvme0n1     259:10   0 476.9G  0 disk
2. Open cfdisk for Partitioning 🔧
Now, let’s open cfdisk to create our partitions. If your hard drive is nvme1n1, use this command:
cfdisk /dev/nvme1n1
This will pop up a window where you can create partitions. Here’s what you need to make:
- Root Partition (
/) for the main system - Swap Partition for extra memory
- EFI Boot Partition if your computer uses UEFI (most modern PCs do)
- You can also create a separate partition for your home directory (
/home) if you like.
For example, if you have about 163GB free, you could create:
- 60GB for root (
/) - 90GB for home (
/home) - 3GB for swap (helps when your RAM is full)
- 800MB for EFI (if using UEFI)
Once you’ve created the partitions, select the Write option in cfdisk to save your changes and exit.
3. Format Your Partitions 🎨
Now, it’s time to format those partitions! We’ll use EXT4 for the root and home partitions, and FAT32 for the EFI partition. Let’s format:
First, check your partitions again with lsblk:
lsblk
You’ll see your newly created partitions listed. Now, format them:
mkfs.ext4 /dev/nvme1n1p6 # Format root partition
mkfs.ext4 /dev/nvme1n1p7 # Format home directory
mkfs.vfat -F32 /dev/nvme1n1p8 # Format EFI partition
mkswap /dev/nvme1n1p9 # Set up Linux swap
4. Mount Your Partitions 🏔️
Time to mount those formatted disks! This will prepare them for the Arch Linux installation. Run these commands:
mount /dev/nvme1n1p6 /mnt # Mount root partition
mkdir -p /mnt/home && mount /dev/nvme1n1p7 /mnt/home # Mount home directory
mkdir -p /mnt/boot/efi && mount /dev/nvme1n1p8 /mnt/boot/efi # Mount EFI partition
swapon /dev/nvme1n1p9 # Enable swap
Check your mount points one more time to ensure everything is set up correctly:
lsblk
Your output should look something like this:
NAME        MAJ:MIN RM   SIZE RO TYPE MOUNTPOINTS
nvme1n1     259:0    0 953.9G  0 disk
├─nvme1n1p6 259:6    0    90G  0 part /home
├─nvme1n1p7 259:7    0    60G  0 part /
├─nvme1n1p8 259:8    0   800M  0 part /boot/efi
└─nvme1n1p9 259:9    0     3G  0 part [SWAP]
nvme0n1     259:10   0 476.9G  0 disk
Congratulations! Your partitions are all set and ready for the Arch Linux installation. 🎊 Let’s move on to the next step!
Step 4: Installing Core Linux Packages and Configurations 🐧
Now, it’s time to bring your Arch Linux to life! We’ll install the essential core packages that make up the Linux system using the pacstrap command. This command will set up the Linux kernel and other important tools on your mounted partitions. Let’s get started!
Install the core packages:
pacstrap -K /mnt base linux linux-firmware \
linux-headers base-devel nano sudo \
intel-ucode \ # use only if you have an Intel CPU
amd-ucode \ # only for AMD CPU
(If you’re not sure about your CPU type, you can check it by running this command:)
lscpu | grep -i "Model name"
Generate fstab:
This step creates a file called fstab that tells Linux how to mount disk partitions when it starts up. Let’s make it!
genfstab -U /mnt >> /mnt/etc/fstab
Check your fstab:
To make sure everything is in order, let’s verify that all your partitions are listed in fstab. You can do this by running:
cat /mnt/etc/fstab
Change into the new system:
Now we need to switch into the mounted file system so we can start making configurations. We do this with the arch-chroot command.
arch-chroot /mnt
Set up localization settings:
Next, we’ll set the language and locale for your system. Open the file /etc/locale.gen and find the line LANG=en_US.UTF-8. Uncomment it (just remove the # at the start) and feel free to uncomment any other localizations you want.
nano /etc/locale.gen
After editing, run this command to generate the locales:
locale-gen
Set the computer name:
Let’s give your system a name! This name will identify your computer on the network. You can replace myhostname with whatever name you like.
echo myhostname >> /etc/hostname
Set a password for the root user: Now, let’s secure your system by setting a password for the root user.
passwd
Create a new user:
It’s a good idea to create a normal user account for everyday tasks. This user will have some extra privileges. Just replace "your username" with your chosen name.
useradd -m -g users -G wheel,storage,power,audio -s /bin/bash "your username"
Set a password for your new user:
passwd "your username"
Give the new user sudo privileges:
Now, we want this user to be able to run commands as a superuser (the admin). To do that, we’ll edit the sudo configuration:
EDITOR=nano visudo
In the file, find the line that says %wheel ALL=(ALL:ALL) ALL and uncomment it (again, just remove the #). Then, save the changes.
Install and enable Network Manager: Finally, let’s install the network manager tools. This will help your system discover and connect to networks when it starts up.
pacman -S networkmanager
systemctl enable NetworkManager
Now you’re all set! You’ve installed the core packages and configured your system. Your Arch Linux is well on its way to becoming fully functional! 🎉
Step 5: Install Bootloader 🚀
There are many bootloaders out there, but I chose GRUB. Why? Because it’s mature and has lots of features!
- First, install the required packages.
pacman -S grub \ os-prober \ efibootmgr # only if the system supports UEFI - Now, install GRUB.
If you have a UEFI system, run:
grub-install --target=x86_64-efi --efi-directory=/boot/efi --bootloader-id=GRUBIf you have an older legacy system, use this command:
grub-install --target=i386-pc /dev/xxx # xxx is the storage name. - Generate configurations.
If you are dual-booting with Windows, find the line that says
GRUB_DISABLE_OS_PROBER=falsein the default GRUB configuration file and uncomment it.nano /etc/default/grubNext, generate the GRUB configuration.
grub-mkconfig -o /boot/grub/grub.cfg
Step 6: Installing a Desktop Environment 🖼️
A desktop environment (DE) gives you a friendly user interface to interact with your Linux system. There are many DEs to choose from. KDE is a complete and feature-rich option. If you prefer something simpler, you might like GNOME, Cinnamon, or XFCE. This setup focuses on KDE.
To install KDE, run:
pacman -S plasma-meta kde-system kde-utilities \
kde-graphics # optional software
After that, enable the login manager that comes with the plasma-meta package group:
systemctl enable sddm
Now everything is ready! Exit the chroot session, unmount the disks, and restart your system:
exit
umount -R /mnt
swapoff /dev/"swap partition name"
reboot
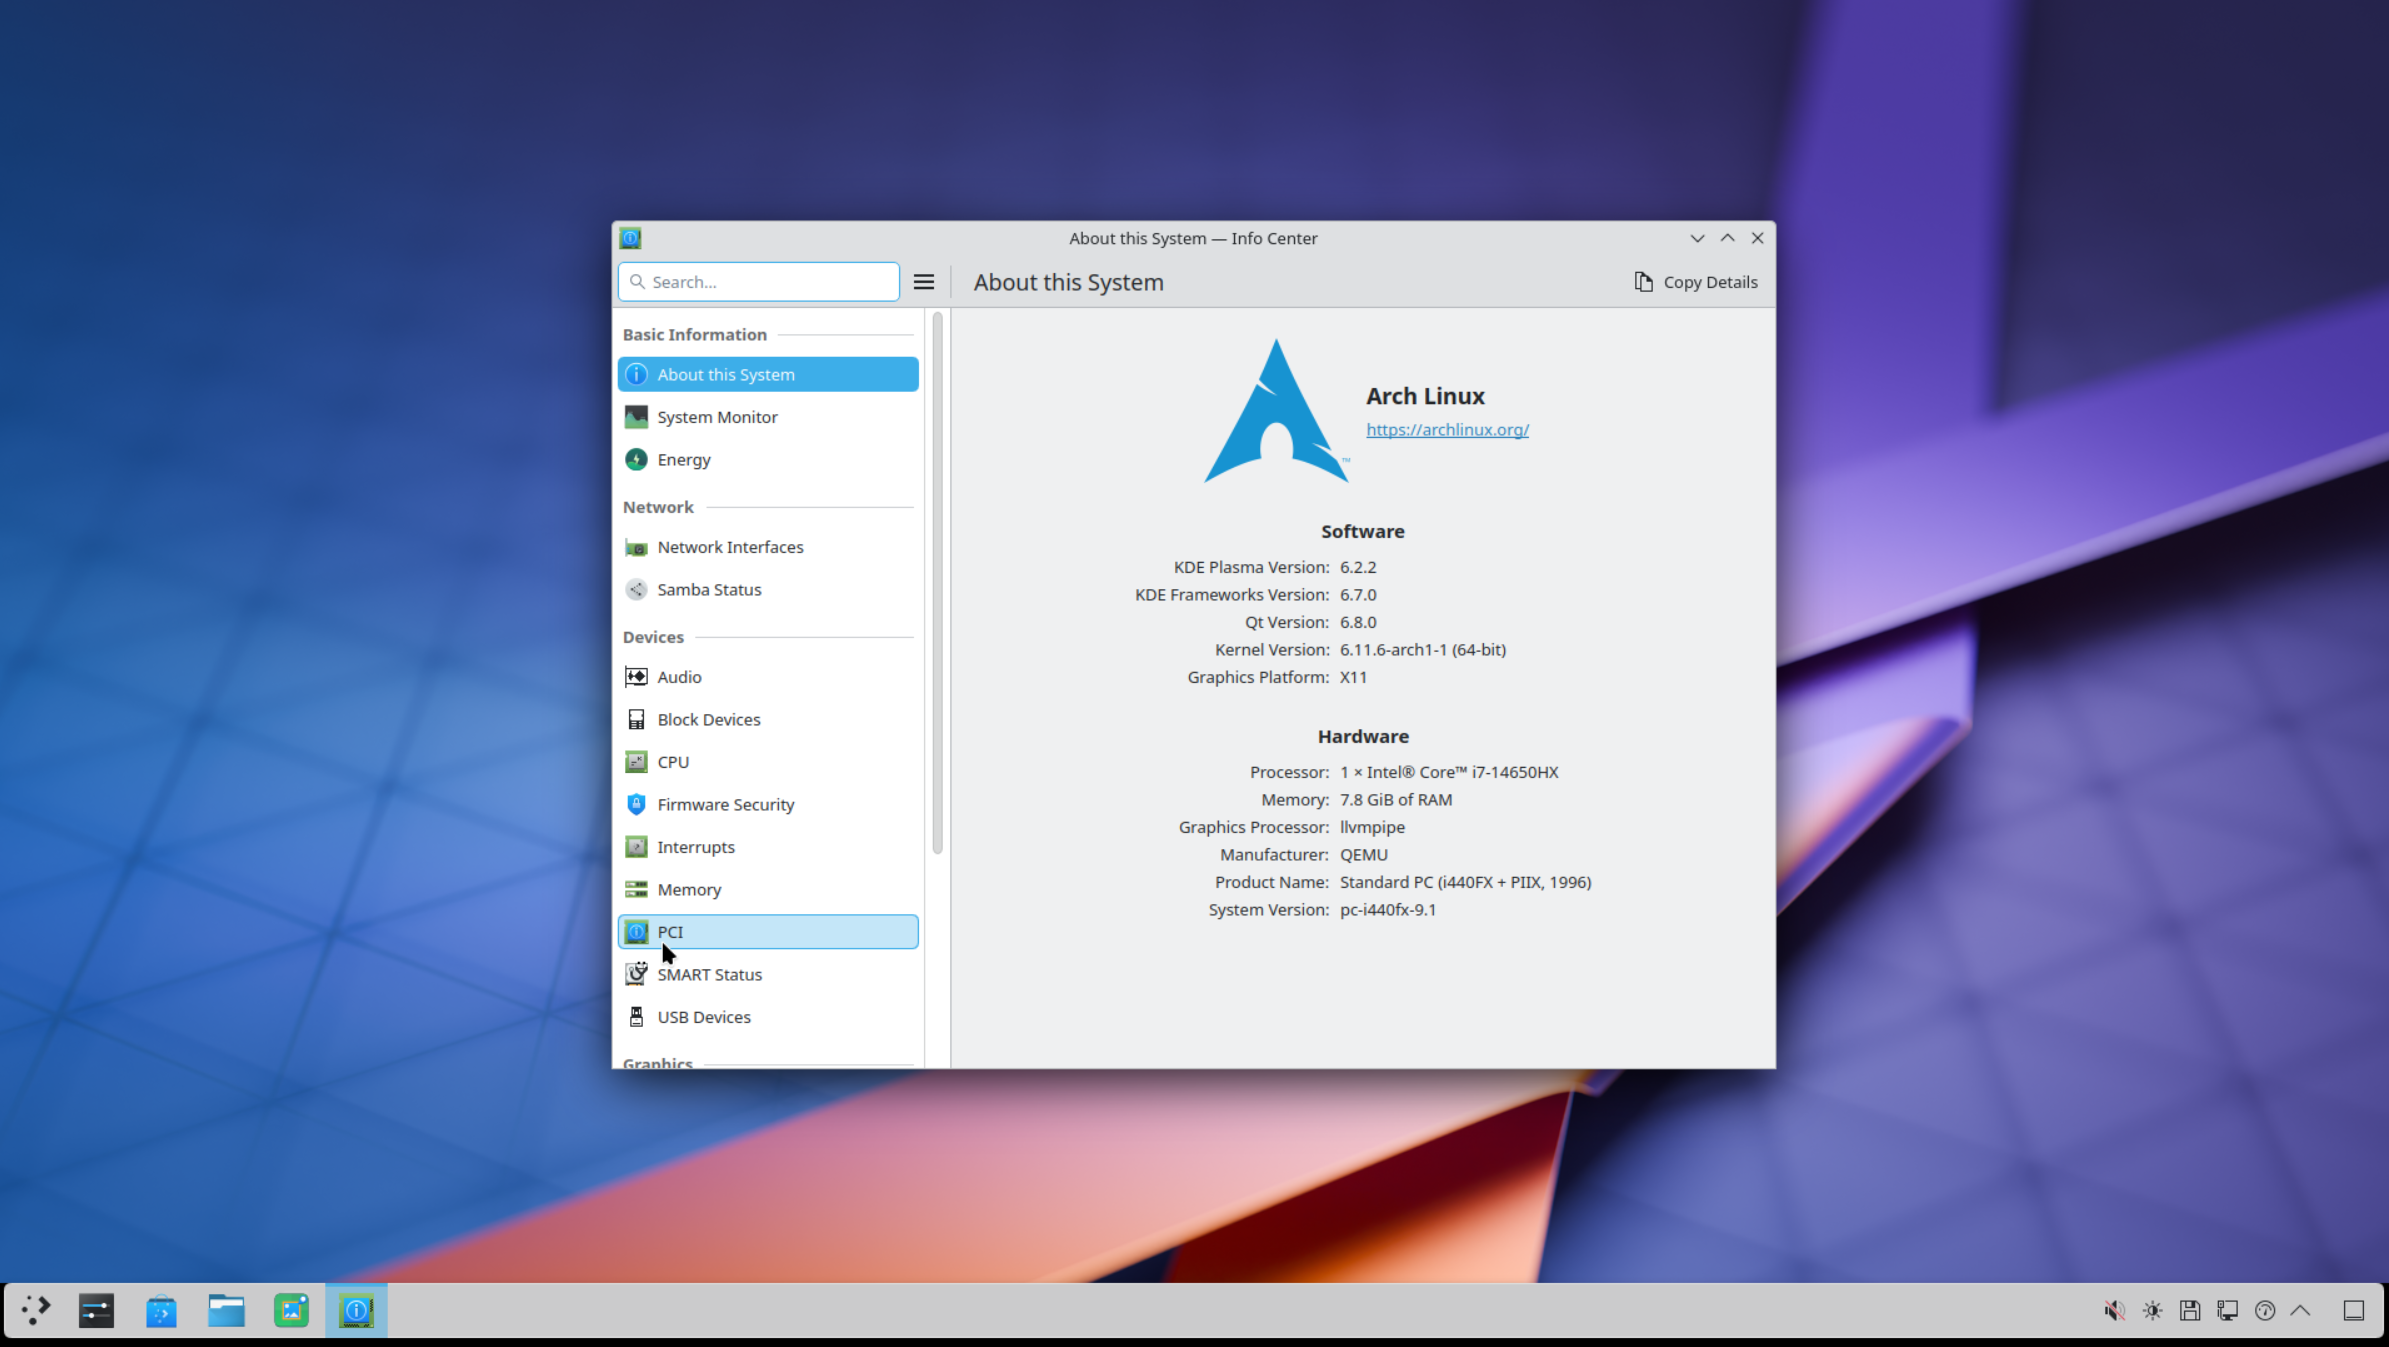
When your system boots up, you will be greeted by your new desktop environment!
Step 7: Post Install Packages 🛠️
Alright, let’s pimp up your Arch Linux setup with some essential packages! Here’s how you can make your system more powerful with extra tools and dev environments.
1. Add AUR Support
The AUR (Arch User Repository) is a huge collection of community-maintained scripts for installing software that’s not available in the default pacman repositories. You can either download and run these scripts yourself or use a tool to make it super easy. My go-to choice is yay, because it works just like pacman—easy to remember! Other popular options are pacaur, aurman, aura, pacseek, etc.
# Install yay
sudo pacman -S --needed git base-devel && git clone https://aur.archlinux.org/yay.git && cd yay && makepkg -si
With yay, you can:
- Update the system:
yay - Search for a package:
yay -Ss xyz - Install a package:
yay -S xyz - Uninstall a package:
yay -Rns xyz - Force remove (use with caution):
yay -Rdd xyz - Clean unused dependencies:
yay -Yc - Show remote package info:
yay -Si xyz - Show local package info:
yay -Qi xyz - List all installed packages:
yay -Qq - List explicitly installed packages:
yay -Qqe
2. Proprietary Drivers
If you have a laptop with hybrid graphics (like Intel + Nvidia or AMD + Nvidia), you’ll want to get the right drivers. To check what graphics cards you have, run:
lspci | grep -E 'VGA|3D'
Then, install the drivers you need:
sudo pacman -S mesa xf86-video-intel         # For Intel GPUs
sudo pacman -S nvidia nvidia-utils nvidia-settings  # For Nvidia GPUs
sudo pacman -S mesa xf86-video-amdgpu        # Open-source AMD driver
If you’ve got Nvidia hybrid graphics, you can install envycontrol to easily switch between GPUs.
yay -S envycontrol
To list or set the GPU mode:
envycontrol --query            # Show current GPU
envycontrol --switch nvidia     # Options: integrated, hybrid, nvidia
3. Install a Web Browser
Choose your favorite browser(s) and install them:
yay -S google-chrome           # Google Chrome
pacman -S chromium             # Open-source version of Chrome
pacman -S firefox              # Mozilla Firefox
yay -S opera                   # Opera browser
Step 8: Setting Up Development Environments 🧑💻
Let’s get your coding environment all set up! Arch Linux is great for developers, and here’s how you can get started with various programming tools.
1. Java Development Kit (JDK)
yay -Ss jdk                     # List available JDK versions
yay -S jdk-lts                  # Install long-term support (LTS) version, or specify another version if you need
To check or set up Java versions:
archlinux-java status           # Show installed JDKs and the current default
archlinux-java set <JAVA_ENV_NAME> # Set default Java version
2. Python Development
First, install pyenv to manage different Python versions.
sudo pacman -S pyenv
pyenv install 3.8               # Install Python 3.8.x
pyenv install 3.11              # Install Python 3.11.x
pyenv global 3.11               # Set Python 3.11 as the default
3. Node.js Environment
Install nvm (Node Version Manager) first:
yay -S nvm
Add nvm paths to ~/.bashrc:
echo 'export NVM_DIR="$HOME/.nvm"' >> ~/.bashrc
echo '[ -s "/usr/share/nvm/init-nvm.sh" ] && \. "/usr/share/nvm/init-nvm.sh"' >> ~/.bashrc
source ~/.bashrc
Now you can install any Node version:
nvm install x.y.z               # Install Node version x.y.z
nvm use x.y.z                   # Set current Node version
node --version                  # Check the current Node version
4. Ruby Development Environment
Install rbenv for Ruby version management:
yay -S rbenv
yay -S ruby-build               # Required for installing Ruby versions
echo 'eval "$(rbenv init -)"' >> ~/.bashrc
source ~/.bashrc
To install and set up Ruby:
rbenv install 3.0.0
rbenv global 3.0.0              # Set Ruby 3.0.0 as default
gem -v                          # Check that Ruby is correctly set up
5. .NET Environment
yay -S dotnet-install
dotnet-install --channel 8.0    # Install the .NET version 8.0
6. Docker
Install and set up Docker:
sudo pacman -S docker
sudo usermod -aG docker $USER   # Add your user to the Docker group
sudo systemctl enable docker
After a system reboot, check that Docker is running:
sudo systemctl status docker
7. Database Tools
For database management, here are some good gui tools:
sudo pacman -S dbeaver          # DBeaver, supports multiple databases
yay -S pgadmin4-desktop         # Postgres admin tool
yay -S sql-workbench            # MySQL Workbench
yay -S mongodb-compass          # MongoDB management tool
Step 9: Install IDEs 💻 🛠️
Now that you’ve set up the development kits you need, let’s get some awesome IDEs to write code!
1. Visual Studio Code
Quick and powerful, VS Code is a top pick for developers.
sudo pacman -S code
2. JetBrains Toolbox
Want options? JetBrains Toolbox lets you choose from their lineup of IDEs (including Android Studio!).
yay -S jetbrains-toolbox
3. Good Old Eclipse
If you’re an Eclipse fan, check out these specialized versions for different languages.
yay -S spring-tool-suite      # For Spring framework (Java)
yay -S eclipse-jee-bin        # Eclipse for Java EE
yay -S eclipse-cpp-bin        # Eclipse for C/C++
yay -S aptana-studio          # Eclipse-based IDE for PHP
Step 10: Cloud CLI Tools ☁️
Working with cloud services? These CLI tools will make managing them a breeze!
yay -S aws-cli-v2-bin         # AWS CLI, command: aws
yay -S google-cloud-cli       # GCP CLI, command: gcloud
sudo pacman -S azure-cli      # Microsoft Azure CLI, command: az
Step 11: Miscellaneous 🎩
1. Make Your Terminal Look Awesome with starship
Let’s make your terminal look stylish! starship is a cool tool to add colors, symbols, and more.
pacman -S starship                  # Install starship
echo 'eval "$(starship init bash)"' >> ~/.bashrc  # Load starship in each terminal
mkdir -p ~/.config && touch ~/.config/starship.toml  # Create config file
Now add this funky setup in the config file with:
nano ~/.config/starship.toml
Paste this sample configurations:
palette = "dracula"

[aws]
style = "bold orange"

[character]
error_symbol = "[λ](bold red)"
success_symbol = "[λ](bold green)"

[cmd_duration]
style = "bold yellow"

[directory]
style = "bold green"

[git_branch]
style = "bold pink"

[git_status]
style = "bold red"

[hostname]
disabled = false
ssh_only = false
trim_at = "."
style = "bold green"

[username]
format = "[$user]($style) on "
style_user = "bold yellow"
show_always = true
style_root = "bold red"

[sudo]
symbol = '🧙 '
style = "bold red"
format = '[as $symbol]($style)'
disabled = false

[palettes.dracula]
background = "#282a36"
current_line = "#44475a"
foreground = "#f8f8f2"
comment = "#6272a4"
cyan = "#8be9fd"
green = "#50fa7b"
orange = "#ffb86c"
pink = "#ff79c6"
purple = "#bd93f9"
red = "#ff5555"
yellow = "#f1fa8c"
Close and open your terminal to see the magical transformation!
2. Entertainment: Music and Videos
Time for some fun! Here are great media players for your audio and video needs: (There is plenty: vlc, clementine, deadbeef, mplayer, strawberry, amarok, …)
sudo pacman -S audacious smplayer # Audacious for music, SMPlayer for videos
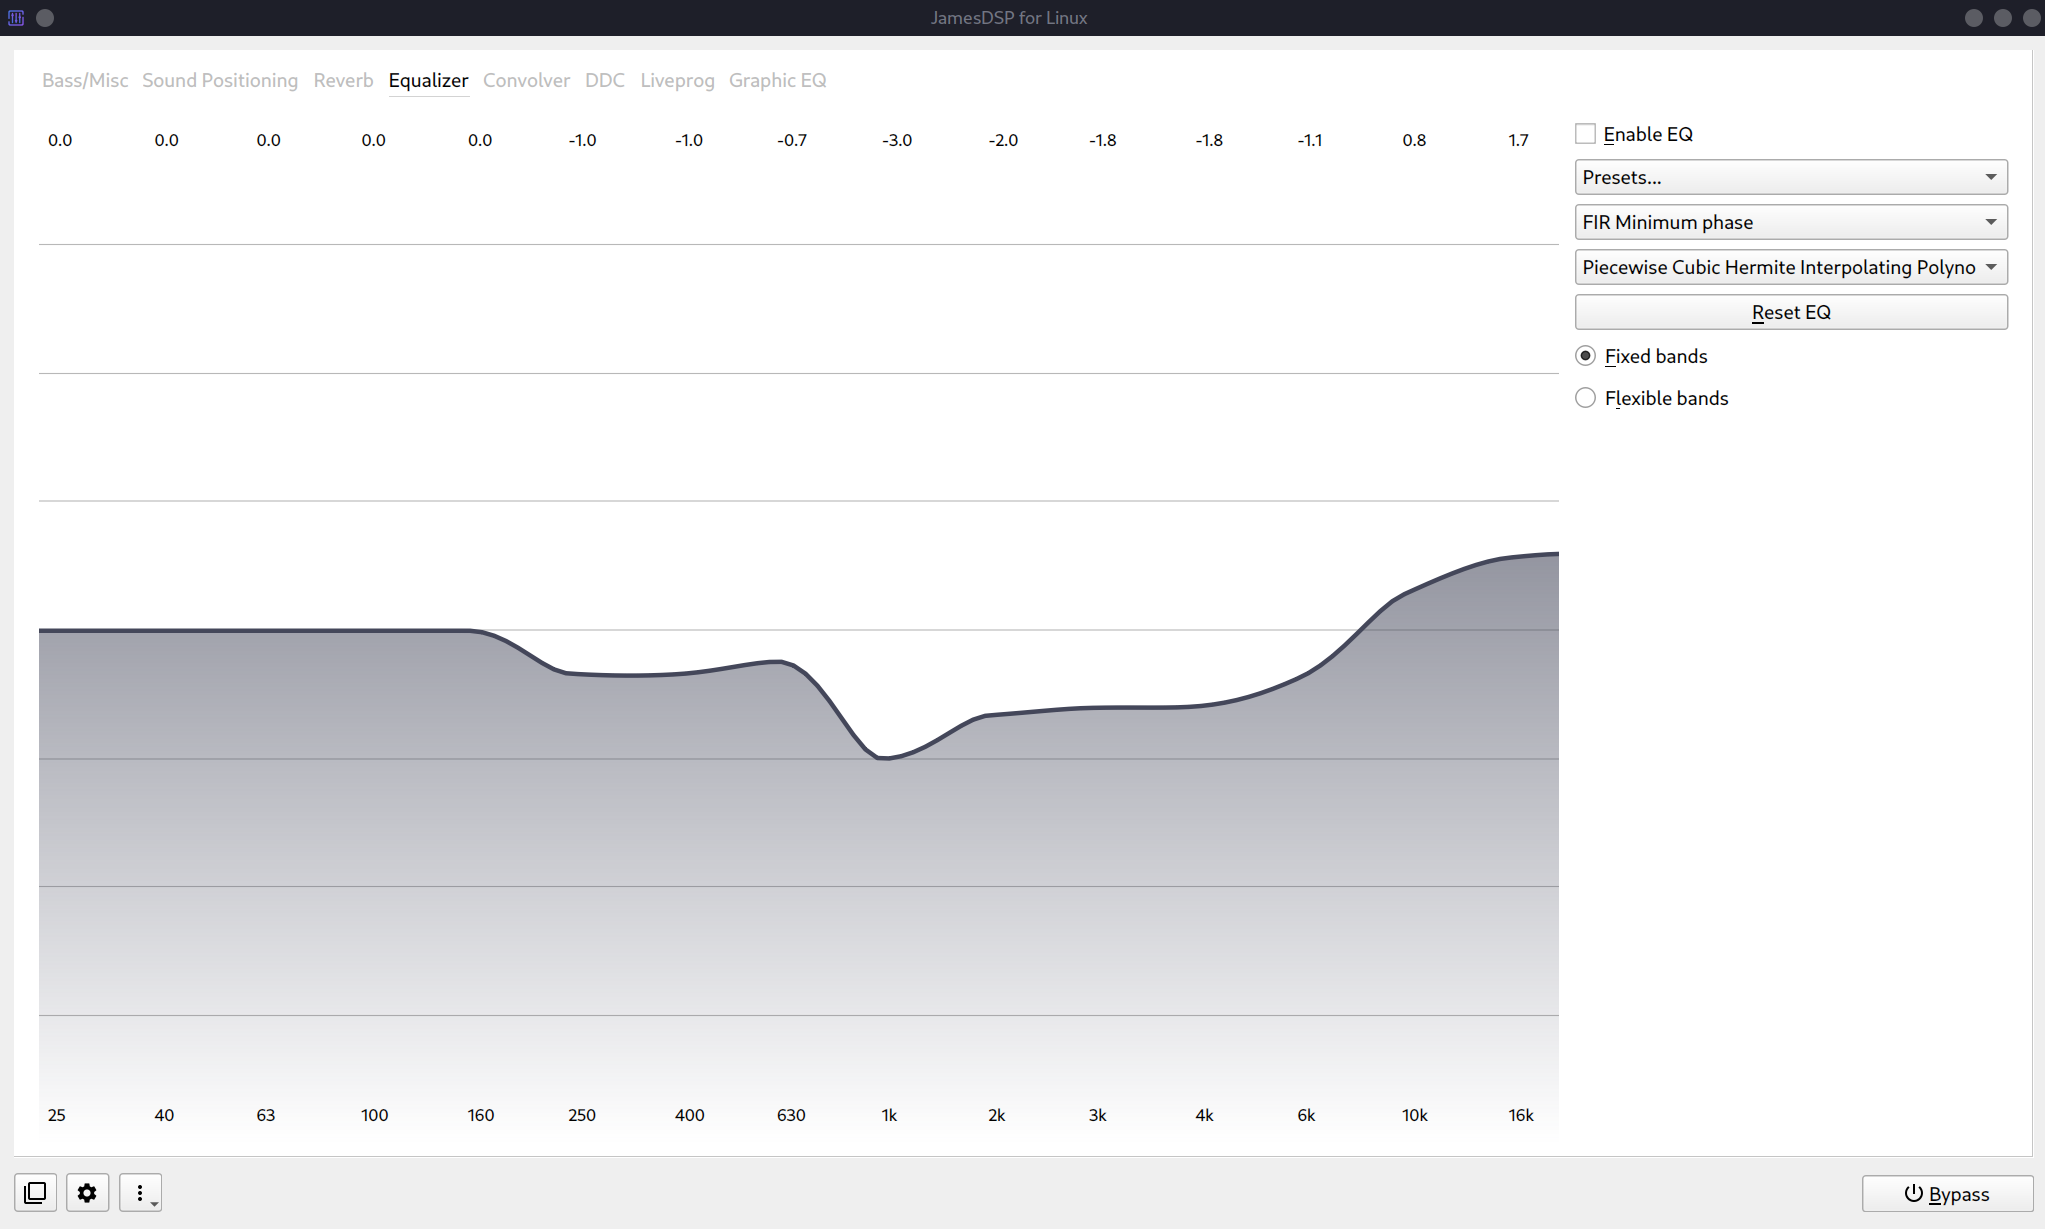
Want system-wide sound effects? Try JamesDSP for an enhanced audio experience.
yay -S jamesdsp
3. Communication Apps
Stay connected with friends, family, or your team using these popular apps:
- Microsoft Teams for Linux:
yay -S teams - Slack:
yay -S slack-desktop - Discord:
sudo pacman -S discord - Skype:
yay -S skypeforlinux-bin
4. Disable File Indexing (KDE Only)
KDE’s file indexing can sometimes slow things down. Here’s how to disable it:
- Open System Settings.
- Go to Workspace Options > File Search.
- Unselect File Indexing and click Apply.
5. Fix Missing Windows Entry in Dual Boot Grub Menu
If Windows doesn’t show up in the Grub menu, follow these steps:
- Open your Windows partitions in the file manager (this mounts them).
-
Then update Grub:
grub-mkconfig -o /boot/grub/grub.cfg
With these tools and customizations, you’ve transformed your Arch Linux into a powerhouse ready for anything—coding, gaming, creating, or just enjoying a sleek, personalized experience. You’re now in control of a system built exactly the way you want, with the power to expand, modify, and customize as you grow. Arch Linux isn’t just an OS; it’s a launchpad for learning and exploring your own potential. So go ahead, break things, fix them, and build something amazing. This is your machine, your rules—now let’s see what incredible things you can do with it!
Comments